

Edge Tunnel (ELB)
The Edge Tunnel feature lets you securely expose your local services to the public internet while maintaining the security and simplicity of your RingLink mesh network. Whether you're running self-hosted tools like Gitea or Samba, or hosting a temporary service for external users, Edge Tunnel gives you the control and flexibility to share what you need—when you need it.
🚀 Why Choose Edge Tunnel?
Encrypted Connections
Services exposed remain part of your secure mesh network.
Public Endpoints
Each tunnel includes a public IP and domain for easy access.
Granular Access Control
Precisely control which ports and services are exposed to the internet.
How It Works
Here's a behind-the-scenes look at what happens when you create an Edge Tunnel:
Smart Load Balancer
RingLink deploys a lightweight, fully managed load balancer distributed for high availability.
Public IP and Domain
Every Edge Tunnel instance is assigned a public IP and domain, which can be used as-is or mapped to a custom domain (via CNAME).
Port Mappings
Easily expose specific services by mapping ports in the dashboard. Whether it's a web app or file server, you have full control over what's accessible.
Use Cases
Application Hosting
Securely host and expose any applications or APIs
Global Access
Accelerate service access worldwide with built-in optimization
Load Balancing
Distribute traffic across multiple backend services
Getting Started
Edge Tunnel is available in all RingLink plans. Pro and higher plans include additional features:
- Multiple deployment regions
- Anycast ELB support
- Dedicated IP addresses
Steps to Set Up an Edge Tunnel
Navigate to the Edge Tunnel Menu
- Open the RingLink Dashboard
- Select Edge Tunnel from the menu
Create a Tunnel
- Click the Create button in the top-right corner
- Fill in the details:
- Name: A meaningful name for your Edge Tunnel
- Network: Select the network where the tunnel will operate
- Region: Choose a deployment region (Pro plans unlock additional regions)
- Type:
- Shared IP: Available on all plans
- Dedicated IP: Available with Pro or higher plans
Finalize Setup
- Click Create to deploy the Edge Tunnel
- Wait a few minutes for the status to update to Running
Port Mapping Rules
To expose specific services through your Edge Tunnel:
Access the Edge Tunnel Details Page
- From the Edge Tunnel List, click Details for the desired instance
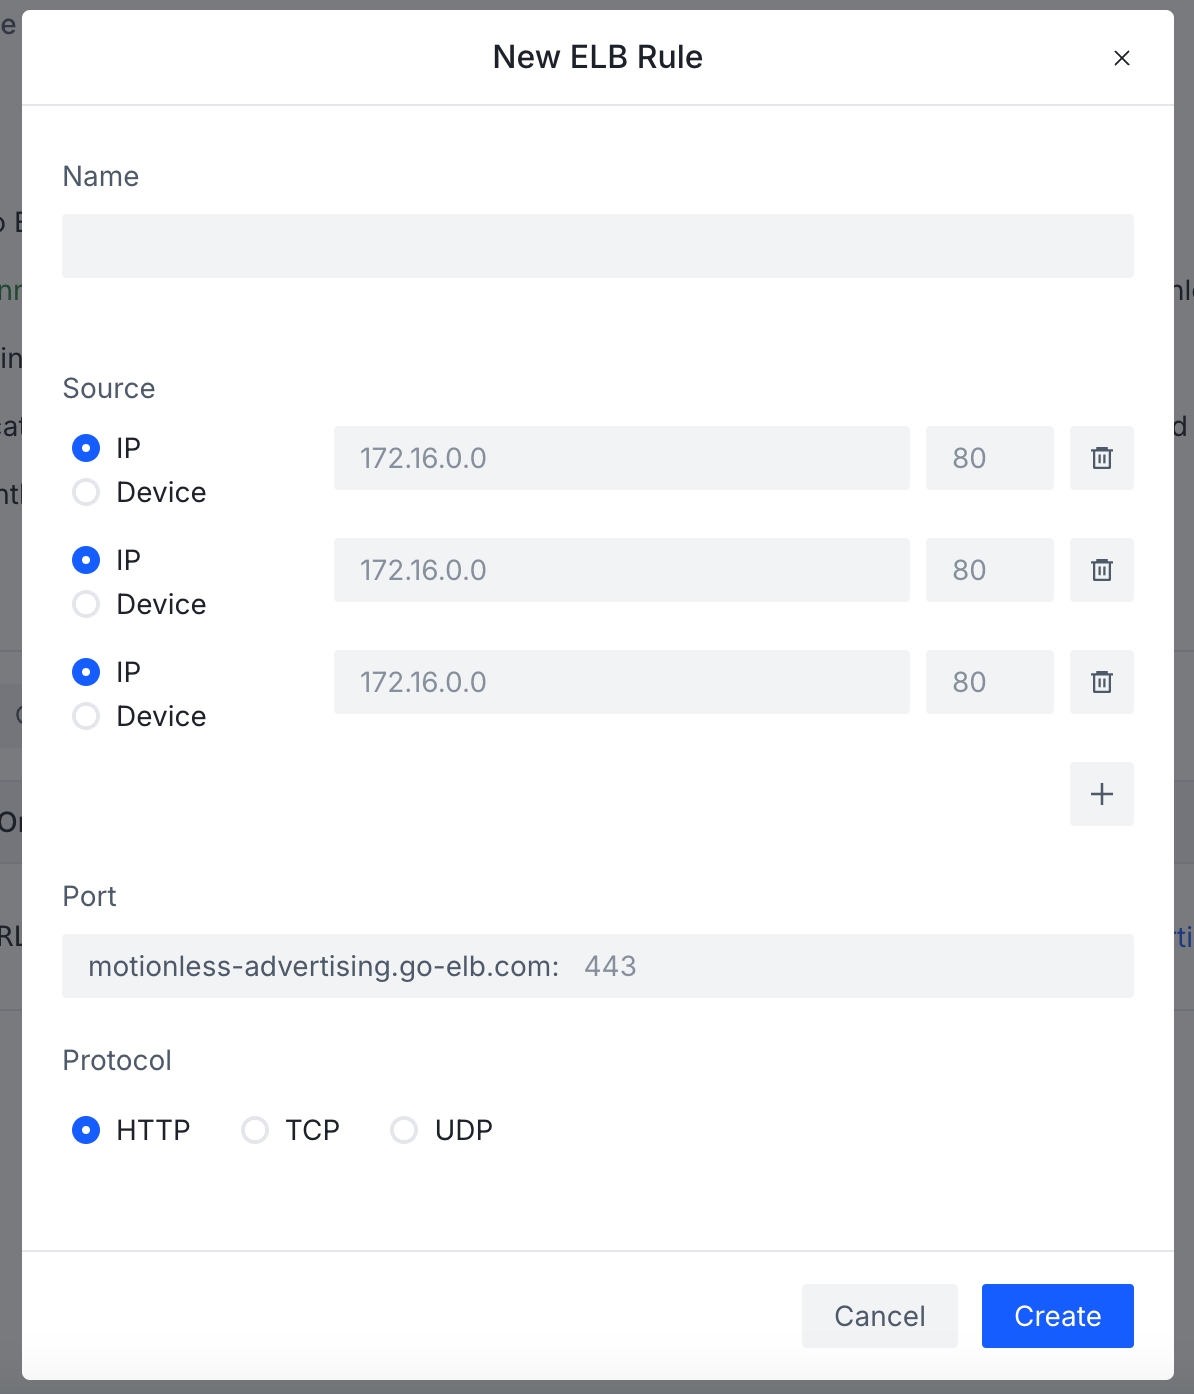
Create a Port Mapping Rule
- Go to the Rules tab and click Create
- Fill in the fields:
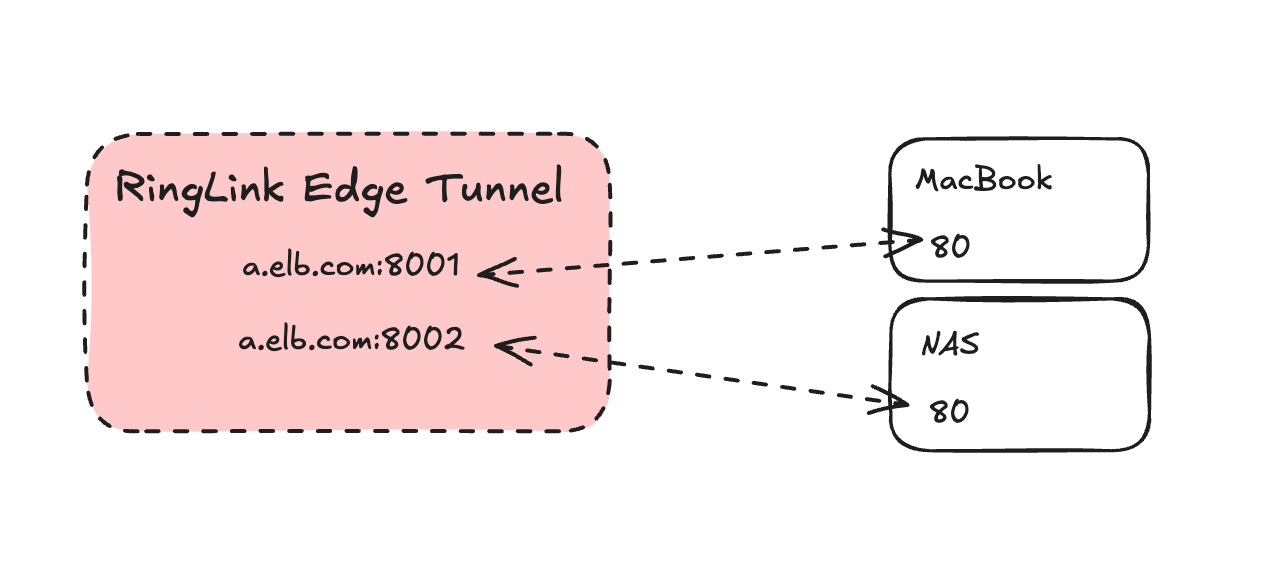
- Source Port: Port on the Edge Tunnel (e.g., 8001)
- Destination Port: Local device port (e.g., 80)
- Protocol: Select HTTP, TCP, or UDP
- Click Create to save
Test the Service
- Wait ~2 minutes for the rule to apply
- Access the service via the Edge Tunnel's domain and port (e.g.,
vivacious-sight.for-test.com:8001)
Monitoring
Access real-time metrics and historical data through:
- Metrics tab on tunnel details page
- Traffic flow visualization
- Performance statistics